1- Open Outlook 2013 on your Computer.
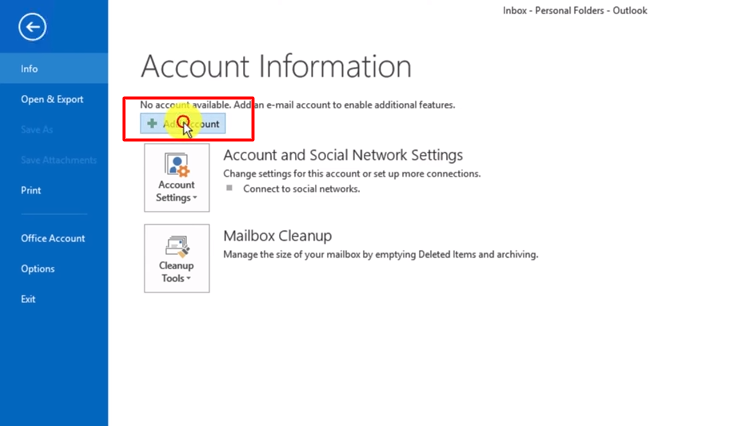
2- Click on the File > Add Account.
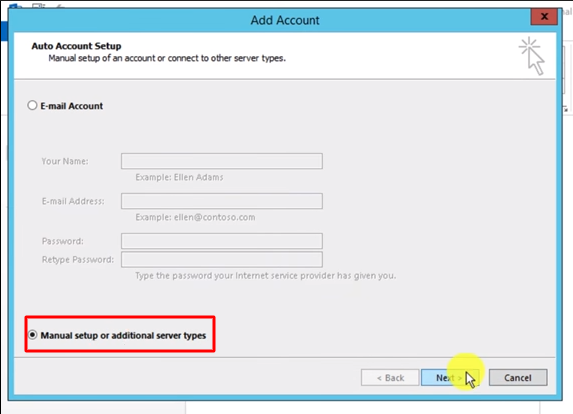
3- Click on manually configure an account.
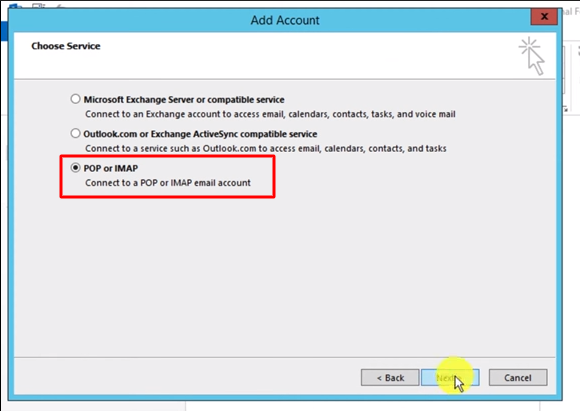
4- Click on IMAP or POP3 then click on the Next button.
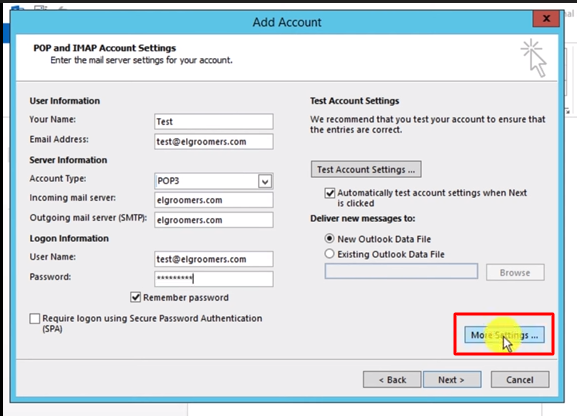
5- Now fill out this information.
6- Write your full name in your name box.
7- Write your email address.
8- Select account type, POP3 only sync your inbox and leave a copy on the server. But IMAP sync all mail folders, if you delete any email it will also be deleted from the server.
9- Write your domain name in the Incoming and Outgoing server box.
10- Write your email address again in the user name box.
11- Write your email password in the password box.
12- Click on the More Settings button.
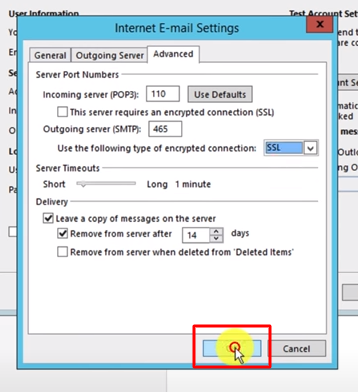
13- Here click on the Outgoing Server tab, and check on the box My outgoing server (SMTP).

14- Now click on the Advanced Tab Incoming port will be 110 and the outgoing port will be 465 with SSL encryption.
15- Click on the OK button.
16- Now click on Test Account Settings.

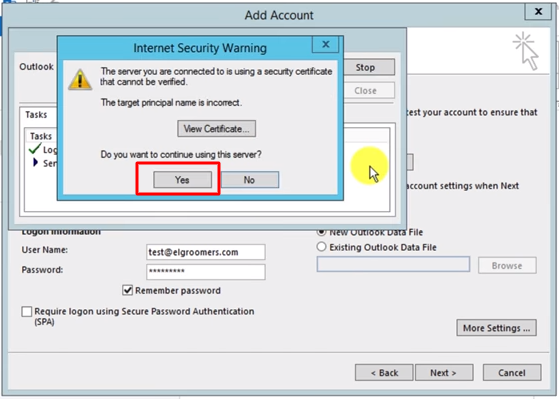
17- Click on yes if it gives an SSL warning.
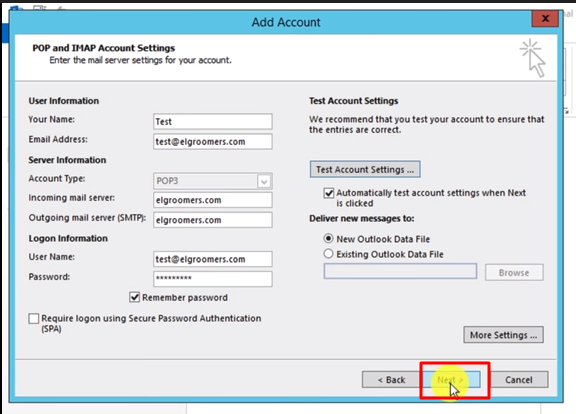
18- Click on the Next button, the account will perform testing once again.
19- Your account has been configured successfully.
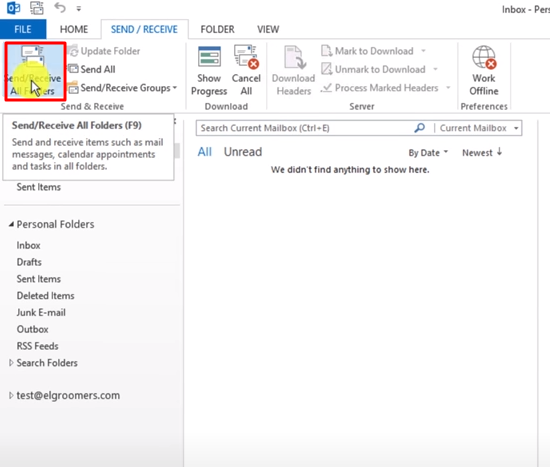
20- Click on send / Receive button to retrieve all your emails from the server.