1- Select the 'Tools' menu.
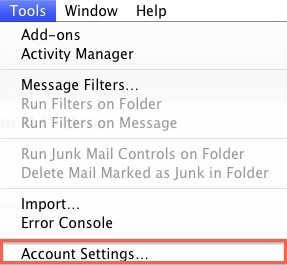
2- Select Account Settings.
3- Click the Account Actions button.
4- Click Add Mail Account.
5- Enter your name as you would like it to appear on your outgoing mail messages.
6- Enter your E-mail address.
7- Enter your E-mail password.
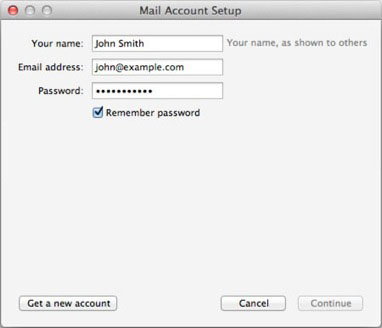
9- Click the Continue button.
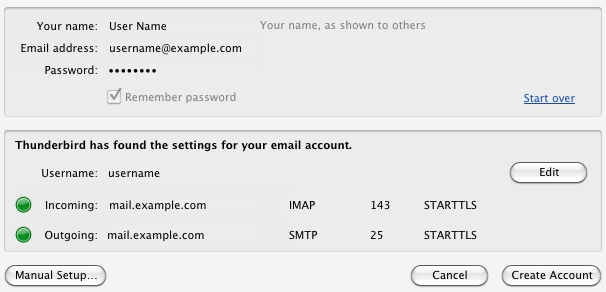
10- Thunderbird will now attempt to setup the account automatically. It will create an IMAP account and will not use SSL.
11- Once the automatic setup has completed click Manual Setup.
12- Click the "Server Settings"
13- Enter your full email address as the "User Name"
14- Click Outgoing Server (SMTP) from the left-hand column.
15- Highlight your new SMTP Server and click Edit.
16- Enter your entire email address as the User Name, under the Security and Authentication section.
17- Change the Port from Port: 25 to Port: 26
18- Give this account a nickname for future reference.
19- Click Ok
Take a minute to review your account information. If everything appears to be fine, click Ok to finish.
You should now be able to send and receive mail.
